GUIDE

How to apply hair extensions using the tape-in method? Our experts will guide you through the entire process and show you how simple this method is.

Are you considering tape-in hair extensions? This is a very good choice! We are sure you will fall in love with your hair extensions! The tape in method is a completely non-invasive method, which makes it safe for our natural hair. It is also very quick and simple.

However, when deciding to extend or thicken your hair, remember that its correct application is extremely important. To ensure that your metamorphosis is carried out safely and comfortably, perform the service in a professional hair salon.

First application:

  1. Brush your hair, then wash twice or even three times with a cleansing shampoo. Rinse your hair thoroughly, do not apply conditioner, just comb and dry thoroughly. In order not to close the hair cuticle and thus increase the adhesion of the tapes, do not model the hair on the brush from the root, nor straighten it. In case if you have straight cut hair, you should thin the ends. This activity must be done before putting on the bands.
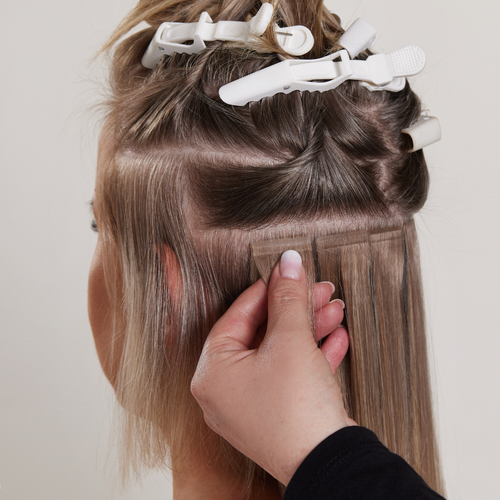
  2. Next, divide your hair into sections. This will be facilitated by our special brush with a pick. Separate the top part of the hair on the head - the crown, and clip it in place.
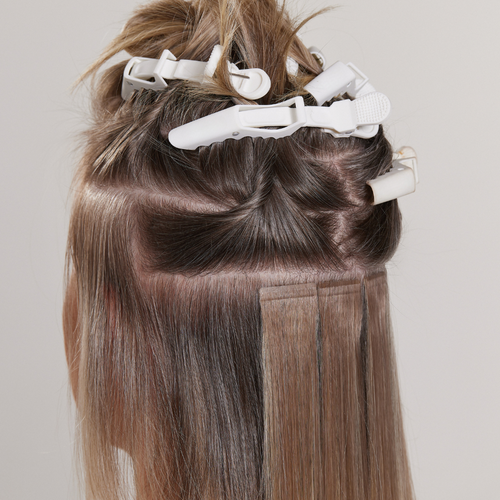
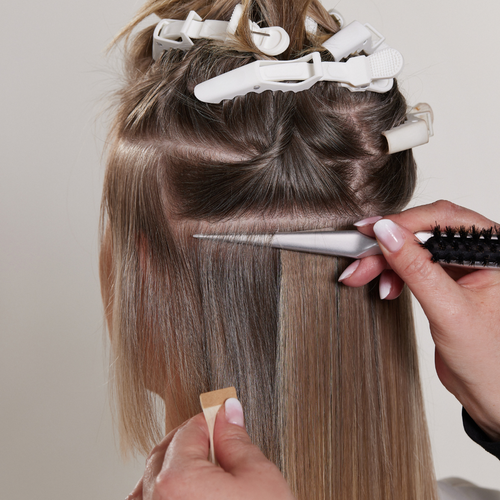
3. Separate the first straight line, which should be at a distance of 2 - 2.5 cm from the hair clipped. Separate the lines pointing downwards.

4. Make the next section at a distance of 2 - 2.5 cm from the first one.

5 Continue separating the next lines to the end of the occipital part of the head.

6.Start extending or thickening hair by putting on the first band of hair from the lowest section you have designated (from the very bottom). After putting bands on the entire bottom line, begin application in the next higher section.

7. Apply the strands always start from left to right or right to left, but not from the center.

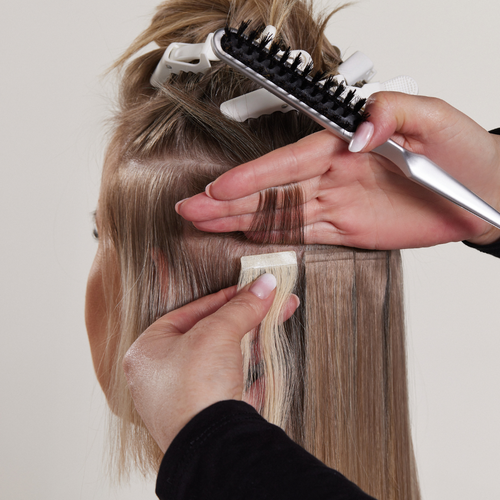
8. Prepare the strands for application by removing the protective paper. Try not to touch the adhesive side of the tape with your fingers.

9. To apply the hair strand, first separate a strand of natural hair. It must not be too thick (because the strand will not stick together) or too thin (because too little natural hair may be stressed). The selected hair strand should resemble a barcode.

10. Then put three fingers over the band of natural hair, and put your index finger under the band, lift your hand upwards.

11. Put the first hair band under the natural hair, so that the adhesive tape is facing up. Keep a distance of at least 2 mm from the skin. Do not stretch the hair while gluing it to the tape. Lower your hand down so that the smallest finger presses the natural hair to the adhesive. Then glue the second band of hair evenly on top of the band of natural hair.

12. Thoroughly squeeze the two bands with each other with your fingers and, moving your fingers from the center outward, push out the air between the bands.

13. Continue by putting on more bands at a distance of 0.5 cm from each other. For a full hairstyle, do not leave too large gaps between bands.

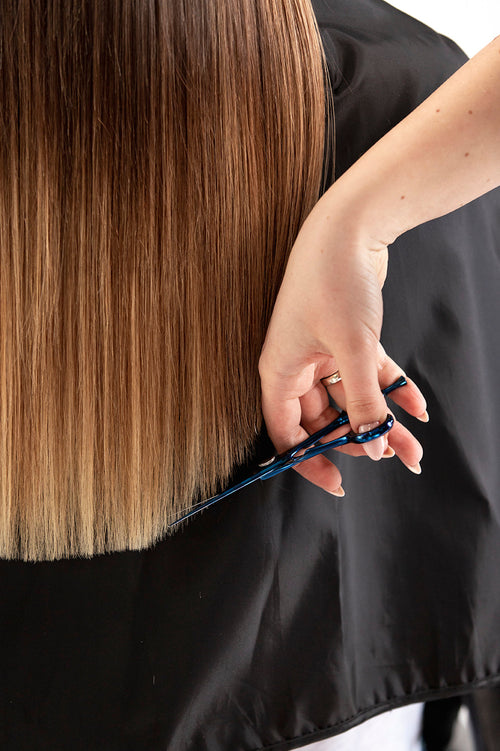
14. After putting all the bands on, do a cut on dry hair to shape the hairstyle.

Do not soak, wash or perform any treatment on the hair for 24 hours after application. During this time, a waterproof bond of the adhesive in the strips is formed.